Wedding Guest Book
Here are some pictures of my guestbook. Instead of the traditional guestbook I decided to make mine a scrapbook. I had my photographer take pictures of all my guests during dinner as well as had an area set up by the table cards where guests could write special messages or advice. I arranged each page by table number and included the pictures of my guests as well as their messages. I was able to embellish the pages with a few response cards and table seating cards too. A year later it is still fun to look through the pictures of all my guests and read the messages they left for us.
Wedding Scrapbook
I wanted to share some of my favorite pages from my wedding scrapbook and some tips on how I made them.
 |
| For this page I added my fan programs. The front had information about the ceremony and wedding party. On the back guests could complete a wedding day crossword or mad libs story. It was so fun to read the stories after the wedding. Inspiration for the fans from http://diy.weddingbee.com/topic/intimate-weddingss-easy-diy-wedding-programs-tutorial |
 |
| Here is another example of how I used a card to embellish the page. Running along the bottom of the page I used a part of a card as a border. |
The page I am showing is the first dance and mother/father dance. Here I embellished the page with more wedding cards as seen on the left with the border along the bottom of the page, the caption at the top, and the two hearts. On the right I added silk flowers that were also used for the cake topper. (See my cake topper here http://diy.weddingbee.com/topic/custom-sports-cake-topper)
Baby Scrapbook
 |
| The first page tells the story of the day I found out I was pregnant. |
 |
| Here is my baby bump page. I used stickers and paper products that came in a scrapbook kit by colorbok. http://www.amazon.com/Scrapbook-Kit-Step-By/dp/B003JIAPMS/ref=sr_1_6?ie=UTF8&qid=1313437170&sr=8-6 |
Christmas Cards
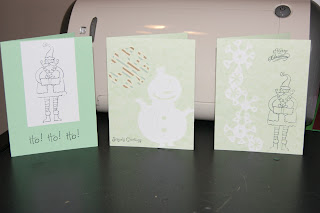
I got a head start on my Christmas cards today and used stickers and stamps I had bought on clearance at the end of last season and my cricut machine with the Stretch your Imagination cartridge.


No comments:
Post a Comment